Wednesday, February 23, 2011
Creation #3: Tuna Lima Bake: Hearty Food for Poor People!
Are you poor, hungry, and suffering through a cold, bleak winter? Then flip open Good Housekeeping's Casserole Book from 1958 and try out the Tuna Lima Bake! Warm, hearty, and healthy, the Tuna Lima Bake may look like something scraped off the bottom of a ship, but it's the perfect way to feed cold hungry poor people in a hurry!
At around $12.00 for the ingredients (and probably less depending on what you have in your cupboard), the Tuna Lima Bake is our cheapest retro food experiment so far. It's also the easiest.
The first step is to mix cream of celery soup, a bag of frozen lima beans (thawed), and some canned tuna in a bowl. Once it's thoroughly mixed, it's time to pour the goop into a casserole dish. Good Housekeeping suggests: "Casseroles will be easier to clean if, before filling them, you grease them lightly with shortening or salad oil applied with waxed paper or a pastry brush." We didn't have shortening, or 'salad oil' or waxed paper or pastry brushes, so we just poured some vegetable oil in the bottom and swirled it around a bit. Then Lydia poured the mixture into the casserole dish.
The next step is optional, and was another tip from Good Housekeeping: "Try varying the toppings on your casserole dishes. Here are some suggestions: corn flakes, crackers, corn or potato chips, in gay designs or as crumbs." We didn't know any gay designs, so we just crumbled some Maui Sweet Onion chips across the top. Yes, this probably wasn't the most authentic topping to choose, but it was the first thing we saw when we opened the cupboard and it sounded yummy.
Our next step involves white bread and cheese. Once again, the recipe calls for American processed cheese, but I wanted real cheese and we already had real cheese without having to buy it, so that decided that. We did go with the white bread, though. It has to be toasted and then cut in half diagonally making triangles. You then cut some triangles of cheese to place on the triangles of toast, and then you can place them across the top of the casserole. Now it's ready for the oven.
The casserole takes about 45 minutes to bake. We were a little worried about the toast and cheese. We weren't sure how you could bake toast and cheese for 45 minutes without it blackening into charcoal, but it actually turned out amazing. The toast gets quite brown and hard, but the cheese gets all thick and melty, a truly delicious combination.
This casserole turned out to be wonderful. It was a nice warm and filling casserole, perfect for a cold winter night, and we both had two helpings. While the cheesy bread on top was probably the best part, the casserole was a nice, cheap way to have a good hearty meal when you're broke and cold.
Tuesday, February 15, 2011
Creation #2: Ham and Cheese Loaf (It's Not Going To Be Pretty)
First off, I should probably mention my new model. I was thinking that it would add a little pizazz to my blog if I had a nice retro housewife model in my pictures. I discovered, though, that there's no way to convince a young woman to come to my house and let me take pictures of her that doesn't make me sound like a creep, so Michal came up with the solution. Let me introduce to you Lydia, my new retro housewife for my blog (at least until I get a new volunteer).
That being said, let's move on to today's creation. We decided on the ham and cheese loaf, another culinary gem from the Gel-Cookery Recipe Book, produced in the 1950's by the Knox Gelatin Company. I chose this one because it particularly grossed me out. Bits of ham and shreds of cheese suspended in unflavored gelatin with chunks of celery just did not sound appetizing to me at all, so I knew it would be a fun recipe to try.
This gelatin recipe is a bit different from the last because for this recipe I had to soften the gelatin first. This is done by sprinkling the gelatin over some cold water and allowing it to (yep, you guessed it) soften. After the gelatin has softened and I had heated some water, I could pour the hot water into the softened gelatin and begin dissolving it. Since I was a little too fixated on making sure every last bit of gelatin was dissolved last time when we made the shrimp chili mold, I decided that Lydia could have the honor of dissolving the gelatin. Once it was completely dissolved, we could add some vinegar and salt, and put it in the freezer to chill. Once again, it needed to chill to unbeaten egg-white consistency before adding the remaining ingredients.
These included diced ham, shredded cheese, and diced celery. I discovered when I began trying to slice my ham that I had bought a pre-sliced ham. This is why it's always important to read the labels when buying ingredients. It didn't make much difference as far as the final result was concerned, but it is annoying to try and chop ham into perfect cubes when you've sliced it the wrong way than it was already sliced and everything just kind of falls apart on the cutting board. I noticed by this point that Lydia was getting a little distracted while we waited for the gelatin to chill, so I put her on celery duty while I measured out the correct amount of shredded cheese. The original recipe calls for American processed cheese (shredded) but I couldn't imagine how one even began to shred processed cheese, so I just got a bag of shredded cheddar.
We lost track of time, which can happen when you're cooking and trying to slice pre-sliced ham, so when I took the gelatin out of the freezer it was less like unbeaten egg whites and more like cold congealed mucus with lumps. I was disappointed, as this was the second time I had done this today. The first time I had just dumped it down the sink and had Lydia do it, but this time neither one of us felt like spending all afternoon making and re-making gelatin, so we decided to go with what we had.
The ham, cheese, and celery were all mixed into the gelatin, and then it was time to put it into the mold. For this recipe I decided to go with my round decorative antique copper mold with the fruit on top. You wouldn't be able to see the fruit design imprinted on clear gelatin, but this seemed like the mold for the job.
We would place the mold into the refrigerator and let it chill for at least 3 hours. Lydia was not thrilled about waiting 3 hours, but it had to be done. I had learned an important lesson last time about letting the mold chill properly and I was going to make sure I did.
This bring us to the garnish. They say that the elderly are supposed to be the voice of experience and wisdom, but obviously I found the one elderly person that wasn't. The old bat at the grocery store was wrong, everyone agreed that the white mystery balls in the picture were pearl onions, and now I was in trouble because I hadn't purchased pearl onions. I had purchased mayonnaise. Yes, some part of my brain thought it might actually be possible to form perfectly smooth balls out of mayonnaise. I'm here to tell you that it's not.
In fact, it's not possible to form mayonnaise into anything other than mayonnaise, although Lydia did have a good time trying. The best she could do was a pointy blob of mayonnaise, smeared all over a slice of tomato by the time she was done. This wouldn't work. Our next thought was cream cheese, and this turned out to be an inspired idea. Not only is cream cheese easily rolled into balls, when you're ready to eat all you have to do is spread it across the tomato and add some ham and cheese loaf.
When it was almost time to pull out the mold, we put several lettuce leaves down on the platter we would use for display, and then placed the tomato slices on each side. On top of the tomatoes were placed one cream cheese ball and a sprig of parsley. When it was time, we would just place the loaf onto the garnish. But first, we had to get it out of the mold...
Last time we had no idea what we were doing and made quite a mess of trying to get the gelatin out of the mold. This time we had learned from experience (and Googling), and felt confidant we knew what to do. I placed the mold into some warm water, and we then counted out 30 seconds while my roommate Mary stared at us like we were idiots. After 30 seconds I pulled the mold out, put a plate over it, and flipped it over. The loaf immediately slid out of the mold! It was an amazing triumph. We then slid the loaf onto the garnish, and I added one last touch: A toothpick upon with I had speared two olives stuck in the middle of the loaf.
My final words on the matter would have to be cold and slimy. While I think this would be an excellent summer dish, when it's hot and no one feels like using the oven, and you want something cool and light, then this would be the perfect dish. Otherwise, it's a cold slimy blob with bits of ham, cheese, and celery in it. While the tomato and cream cheese did add to its overall appeal, for the most part I wasn't impressed. Maybe I'll try it again in the summer and see what I think.
That being said, let's move on to today's creation. We decided on the ham and cheese loaf, another culinary gem from the Gel-Cookery Recipe Book, produced in the 1950's by the Knox Gelatin Company. I chose this one because it particularly grossed me out. Bits of ham and shreds of cheese suspended in unflavored gelatin with chunks of celery just did not sound appetizing to me at all, so I knew it would be a fun recipe to try.
Sprinkling gelatin over cold water |
This gelatin recipe is a bit different from the last because for this recipe I had to soften the gelatin first. This is done by sprinkling the gelatin over some cold water and allowing it to (yep, you guessed it) soften. After the gelatin has softened and I had heated some water, I could pour the hot water into the softened gelatin and begin dissolving it. Since I was a little too fixated on making sure every last bit of gelatin was dissolved last time when we made the shrimp chili mold, I decided that Lydia could have the honor of dissolving the gelatin. Once it was completely dissolved, we could add some vinegar and salt, and put it in the freezer to chill. Once again, it needed to chill to unbeaten egg-white consistency before adding the remaining ingredients.
Lydia gets distracted |
'It's fine the way it is!' |
The ham, cheese, and celery were all mixed into the gelatin, and then it was time to put it into the mold. For this recipe I decided to go with my round decorative antique copper mold with the fruit on top. You wouldn't be able to see the fruit design imprinted on clear gelatin, but this seemed like the mold for the job.
We would place the mold into the refrigerator and let it chill for at least 3 hours. Lydia was not thrilled about waiting 3 hours, but it had to be done. I had learned an important lesson last time about letting the mold chill properly and I was going to make sure I did.
This bring us to the garnish. They say that the elderly are supposed to be the voice of experience and wisdom, but obviously I found the one elderly person that wasn't. The old bat at the grocery store was wrong, everyone agreed that the white mystery balls in the picture were pearl onions, and now I was in trouble because I hadn't purchased pearl onions. I had purchased mayonnaise. Yes, some part of my brain thought it might actually be possible to form perfectly smooth balls out of mayonnaise. I'm here to tell you that it's not.
In fact, it's not possible to form mayonnaise into anything other than mayonnaise, although Lydia did have a good time trying. The best she could do was a pointy blob of mayonnaise, smeared all over a slice of tomato by the time she was done. This wouldn't work. Our next thought was cream cheese, and this turned out to be an inspired idea. Not only is cream cheese easily rolled into balls, when you're ready to eat all you have to do is spread it across the tomato and add some ham and cheese loaf.
When it was almost time to pull out the mold, we put several lettuce leaves down on the platter we would use for display, and then placed the tomato slices on each side. On top of the tomatoes were placed one cream cheese ball and a sprig of parsley. When it was time, we would just place the loaf onto the garnish. But first, we had to get it out of the mold...
Last time we had no idea what we were doing and made quite a mess of trying to get the gelatin out of the mold. This time we had learned from experience (and Googling), and felt confidant we knew what to do. I placed the mold into some warm water, and we then counted out 30 seconds while my roommate Mary stared at us like we were idiots. After 30 seconds I pulled the mold out, put a plate over it, and flipped it over. The loaf immediately slid out of the mold! It was an amazing triumph. We then slid the loaf onto the garnish, and I added one last touch: A toothpick upon with I had speared two olives stuck in the middle of the loaf.
My final words on the matter would have to be cold and slimy. While I think this would be an excellent summer dish, when it's hot and no one feels like using the oven, and you want something cool and light, then this would be the perfect dish. Otherwise, it's a cold slimy blob with bits of ham, cheese, and celery in it. While the tomato and cream cheese did add to its overall appeal, for the most part I wasn't impressed. Maybe I'll try it again in the summer and see what I think.
Friday, February 11, 2011
Mystery Balls
The culinary atrocity you see before is not vomit shaped into a brick and beautifully garnished, it is in fact my next retro food experiment, the Ham and Cheese Loaf. However, I haven't quite got that far. Since in this instance I have a picture to go by I wanted to garnish it as close to the way it's garnished here. This led to my current dilemma.
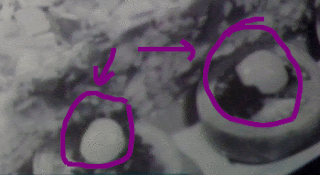
As you can see, there seems to be lettuce in the front and back of the loaf, and then on each side we have slice of tomato, with a sprig of parsley, and....what? What is that? What is that slimy white ball on top of that tomato? Upon closer examination, my first theory was that they were pearl onions. This theory was shot down by a random 80-year-old woman I was bothering in the grocery store yesterday, who told me there was no way that those were pearl onions. She seemed quite adamant about that, although what she thought they were instead she wasn't so clear on.
"Perhaps they're hard-boiled egg halves."
Yeah, maybe hard-boiled quail eggs, because chicken eggs don't come that small. So much for the pearl onion theory. The next person I asked was the older woman who worked at the grocery deli, and she didn't know either, but her guess was yellow cherry tomatoes. I didn't think that they would be that shiny, and why would you garnish tomatoes with smaller tomatoes?
I got a more likely theory from the gal at Peet's coffee, who said it had to be balls of mayonnaise. Of course! They're shiny like mayonnaise and would be the right color. But how did they get the mayonnaise into such perfect round balls? Coffee girl suggested they used a melon-baller, but I would think the mayonnaise would just partially stick to the melon-baller and just plop a mess onto the tomato. Hmmm....
Using my great technological skills I was able to zoom in and produce this image, clearly showing and indicating the white balls in question. Are they perfectly sculpted balls of mayonnaise? Are they tomatoes garnished with smaller tomatoes? Are they tiny alien life-forms that attach themselves to garnishes to feed on their unsuspecting victims??
The next question that I'm usually asked when I interrupt a random stranger's day to ask them about garnish is, "Well, what does it say in the recipe?" Do people really believe that I would go to all the effort of asking a total stranger their opinion on the matter if it clearly said in the recipe what they were? All the recipe says is 'unmold on salad greens and serve with salad dressing,' which I believe translates to, "dump on lettuce and serve with mayonnaise.' That supports the mayonnaise theory.
With any luck Michal and I will be attempting to make the Ham and Cheese Loaf soon, but until then does anybody else have any theories about what those slimy white balls might be?
Wednesday, February 9, 2011
Creation #1: Shrimp Chili Mold a.k.a 'Whale Poop'
My inspiration for this blog was a book I discovered at my local library, The Gallery of Regrettable Food. This was a entertaining look at some of the more interesting culinary creations of the 50's and 60's, culled from a variety of old cookbooks. While I was horrified by a lot of these concoctions and amused by all of them, I wished the book included all the recipes. Sure, some of the recipes were in there, but for the most part they weren't because that wasn't the point of the book. Of course, being the strange person that I am, I felt determined to find some of these old cookbooks for myself so that I could actually make these dishes and horrify my friends and family with my efforts. Who wouldn't?
Last week I took a tour of some of my local area antiques stores (which were fantastic). After a lot of digging through every ridiculous thing that could possibly be considered an antique I started finding some treasures. Among them, several wonderful jelly molds, including three old but solid copper molds and a rather plain round mold. I also found a whole stack of old booklets for all kinds of frightening recipes. I decided my friend and unwilling guinea pig Michal and I would make something right away, and we decided on Shrimp Chili Mold, from a booklet called 'Gel-Cookery Recipe Book.'
Shrimp Chili Mold was picked because it sounded particularly repellent. Its ingredients included shrimp (fully-cooked fresh or canned), chili sauce, lemon juice, pickle relish, and gelatin. Yummy.
Also, I decided that we would also make some egg-and-olive penguins. These adorable little garnishes were apparently all the rage in the '50's, and when I saw them I had to make them.
At the grocery store we were particularly delighted to discover that Knox brand unflavored gelatin, which the recipe called for, was still the unflavored gelatin of choice today. The rest of the ingredients were fairly easy to find, but then we had to decide about the shrimp. Should we go with real shrimp or canned? Which would be cheaper? We considered the canned shrimp for awhile. I didn't even know there was such a thing as canned shrimp, but I was sure it would add character to the recipe. Unfortunately, canned shrimp is surprisingly expensive, especially considering the quality of the product, and it was cheaper to go with a bag of frozen shrimp from the seafood department.
Once we were in the kitchen with our purchases, I set Michal to work hard-boiling some eggs and defrosting the shrimp while I began mixing the dry ingredients for the mold. The dry ingredients would be 1 envelope of Knox unflavored gelatin, salt, more sugar than I would have reasonably expected, and cayenne pepper (which is expensive, especially when you only need a dash). Once these were mixed thoroughly I could add hot water to the mixture, stirring until the gelatin was completely dissolved. I have always been a little worried about dissolving gelatin. I think this stems from an early teenage attempt to make Jell-O that went horribly wrong because of undissolved gelatin. Anyway, I was very determined to dissolve the hell out of that gelatin.
As I mixed gelatin, Michal mixed me up some chili sauce and lemon juice, and then turned his attention back to the eggs. He had finished hard-boiling them and was now peeling them.
When I felt as though the gelatin was quite dissolved it was time to pour in the chili sauce/lemon juice mix, creating a rather unappetizing blood-like mixture in the bottom of the bowl. This was then to be put into the fridge to chill until it was the consistency of 'unbeaten egg whites.' This would give me time to help with the construction of the penguins.
With the penguins I had no instructions, I just knew it involved eggs, olives, and toothpicks. How hard could that be? Not very. An olive is speared into the top of the egg to form the head of the penguin, and then half olives are speared into the sides of the egg for wings or flippers or whatever penguins have. The beak is usually pimiento and the feet could be anything. Michal creatively decided to use cheese for both.
Bits of cheese were cut into little triangles for the feet and a little triangle for the beak, and with that our penguins were complete. I'm not sure why we needed to make three, but it probably was because they were just so darn cute.
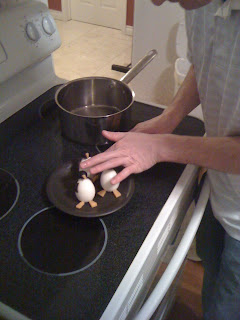
Throughout this process I checked on the gelatin mixture on a very regular basis. I wanted to make sure that I didn't remove it until it was absolutely the consistency of unbeaten egg whites and nothing more or less, because I was sure the success or failure of this recipe would depend on it. The mixture tended to gel from the outside first so it would get a gooey ring around it but be pretty much liquid otherwise. After awhile, though, it slowly started getting to that perfect snot-like texture it needed to be, and it was time to add the shrimp. I poured in the shrimp and mixed them in as evenly as possible, then poured the whole frightening mess into the jelly mold chosen for this experiment, a round decorative copper one that I thought might be too big, but I think it was an excellent choice (or would have been had this not been such an interesting learning experience). Once it was in the mold, I smoothed over the top, making sure the shrimp were evenly distributed and none were sticking out, and put the whole thing in the freezer. I was at Michal's house, using his kitchen, and really didn't feel like being there all night, even if it was in the interest of science. We felt putting it in the freezer would expedite the matter.
Doesn't that look delicious?
Now we had to wait. Ideally, a good three hours of firming (or even more ideally overnight) would have been best, but like I said, I had better things to do that evening. Besides, what were we supposed to do with ourselves while we were waiting for gelatin to set? Play with our penguins?
That was, however, to be our first step towards disaster. Or at least less than perfection. However, this was my first attempt at making anything gelatin-related, and it was to be a learning experience. I was sure perfection would come in time.
I checked on the mold several times and finally decided that it was firm enough to be done. It could have been a lot firmer, but I figured it would be close enough for the purposes of our experiment. This is where we ran into snag #1: How to get the gelatin out of the mold. We seemed to think it would just slide right out onto the plate, and we were disappointed to discover that this wasn't the case. We placed a plate on top of the mold and flipped it over, setting it on the counter, and slowly lifted the mold. Nothing came out. Hmmm...
This is when I made the terrible decision to try helping it along with a rubber spatula. All this essentially did was ruin the lovely design that would have appeared on the sides of the mold and effectively make the whole thing smaller. It also didn't make the gelatin move at all.
Michal, always ready to surprise me, said he thought he once heard something about putting it in warm water to loosen the gelatin. This sounded like an excellent idea, and we tried it at once. While it floated around in the sink of hot water we chatted and cleaned up a little bit, losing track of time. When we decided we'd given enough time to really loosen up we pulled the mold out of the sink to discover that the hot water had helped to further melt my already less-than-firm gelatin into a rather soggy mess. We decided to put it back into the freezer for awhile to firm it back up.
While we waited for it to chill again, we went online to Google the correct way to loosen a gelatin from it's mold. Michal basically had the right idea, but was fuzzy on the details. The water has to be warm, but not too warm, and we're only supposed to put it in the water for about 30 seconds. Good to know. See? It was a learning experience.
A little while later we decided it was at least as firm as it had been before we melted it, so it was time to loosen that gelatin. This time we did it properly, following the directions online, and it still turned a bit soupy. At this point, however, I was getting tired and ready to be done, so we decided to proceed. I effectively removed what was left of our gelatin ring and slid it onto a plate. That's when I realized for presentation it needed to be on the romaine leaves we had specifically bought for this purpose. Annoyed, I quickly arrange some leaves onto a cutting board and Michal took over the tricky task of getting the gelatin ring from the plate onto the lettuce without breaking the ring and ruining the whole thing once and for all. i couldn't even watch I was so sure it was doomed, but somehow he managed. Our last part of the job was to arrange the penguins, and at last we had our complete presentation of our completed Shrimp Chili Mold:
While it had turned out runnier and smaller than it should have, I now knew how to do it properly and could perfect it in the future. I would let it set for the full time allotment or overnight, I would make sure to remove the gelatin from the mold properly, and I would make sure I had prepared a proper spot for it to go once removed from the mold. For my first time, I thought our Shrimp Chili Mold looked magnificent. Michal thought it looked like 'whale poop.'
It was now for the second part of our experiment: the taste test!
Michal, being the brave little guinea pig that he is, was first to try our creation. Here he is, all ready to try his first bite of Shrimp Chili Mold. This would be his last smile for the evening.
To be fair, Michal is not especially fond of shrimp, and I'm not sure why he agreed this would be a good recipe to start with. The whole process revolted him with the exception of the penguins, which he was especially fond of making.
I was starting to get grossed out just watching him begin to eat it. The expressions on his face just seemed to get worse and worse...
I think we can safely say that Michal did not enjoy this particular dish. At all. What's peculiar about the situation is that after that first bite he continued to eat what was on his plate. He had found it absolutely disgusting, and yet for some inexplicable reason he continued to eat it.
Then it was my turn!
And believe it or not I thought it was pretty good. While making it and then when eating it, it was obvious that this was really just shrimp cocktail all mixed up together and held together with gelatin, and that's exactly what it tasted it like. In fact, it was surprisingly flavorful and tasty. While Michal may not agree, I think this was actually a very good dish that I would probably make again, not only to horrify friends and family members, but to also enjoy the wonderful and tasty dish that is the Shrimp Chili Mold. I think it would be especially good served with crackers.
Subscribe to:
Posts (Atom)